其他补充说明:
[md]# 1. 程序出错
尝试使用以下例程
```cpp
#define BLINKER_PRINT Serial
#define BLINKER_WIFI
#include <Blinker.h>
char auth[] = "Your Device Secret Key";
char ssid[] = "Your WiFi network SSID or name";
char pswd[] = "Your WiFi network WPA password or WEP key";
// 新建组件对象
BlinkerButton Button1("btn-abc");
BlinkerNumber Number1("num-abc");
int counter = 0;
// 按下按键即会执行该函数
void button1_callback(const String & state) {
BLINKER_LOG("get button state: ", state);
digitalWrite(LED_BUILTIN, !digitalRead(LED_BUILTIN));
}
// 如果未绑定的组件被触发,则会执行其中内容
void dataRead(const String & data)
{
BLINKER_LOG("Blinker readString: ", data);
counter++;
Number1.print(counter);
}
void setup() {
// 初始化串口
Serial.begin(115200);
#if defined(BLINKER_PRINT)
BLINKER_DEBUG.stream(BLINKER_PRINT);
#endif
// 初始化有LED的IO
pinMode(LED_BUILTIN, OUTPUT);
digitalWrite(LED_BUILTIN, HIGH);
// 初始化blinker
Blinker.begin(auth, ssid, pswd);
Blinker.attachData(dataRead);
Button1.attach(button1_callback);
}
void loop() {
Blinker.run();
}
```
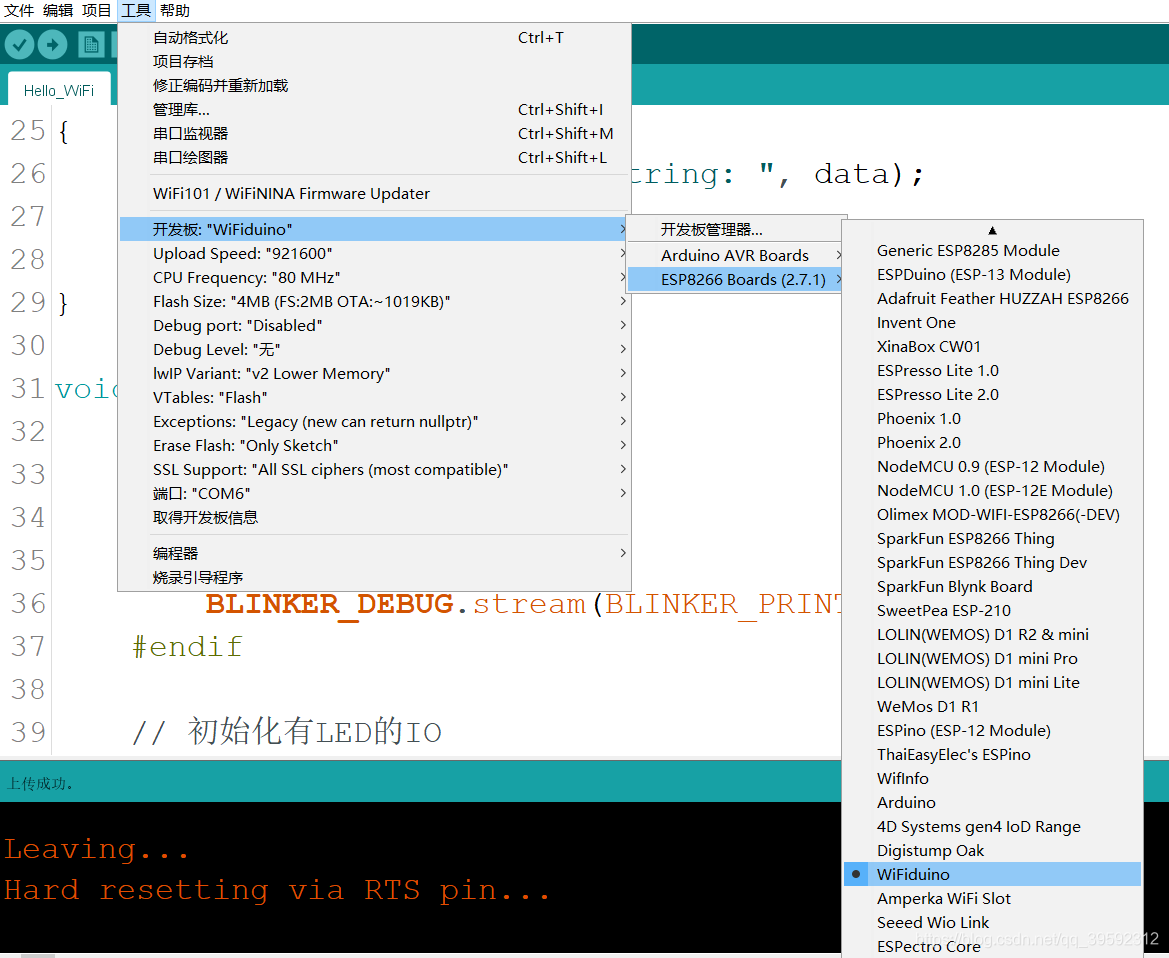
# 2.开发版选择出错
给出样例

# 3.注意查看串口的提示

显示这个就说名成功了
# 4.其他提示
- 注意要接3.3V电源,5V可能会把8266烧坏
- 3V接电源 G接地
# 5.其他参考
Blinker官方帮助文档
[https://www.diandeng.tech/doc/getting-start-8266](https://www.diandeng.tech/doc/getting-start-8266)
8266官方文档
[https://arduino-esp8266.readthedocs.io/en/latest/reference.html#digital-io](https://arduino-esp8266.readthedocs.io/en/latest/reference.html#digital-io)
其他故障总结
[https://github.com/esp8266/Arduino/blob/master/doc/faq/a01-espcomm_sync-failed.rst](https://github.com/esp8266/Arduino/blob/master/doc/faq/a01-espcomm_sync-failed.rst)[/md] |