|
|
之前写了个取模工具,并介绍了使用u8g2显示图片的方法。
https://www.arduino.cn/thread-42174-1-1.html
但这个方法的缺陷是,图片数组存储,会消耗很大的flash空间。
如果是一些简单的图形,并不需要通过上面这种方式显示,u8g2提供常见的图形绘制函数,通过这些函数组合,即可绘制出我们想要的图标。
相关函数参考:https://github.com/olikraus/u8g2/wiki/u8g2reference
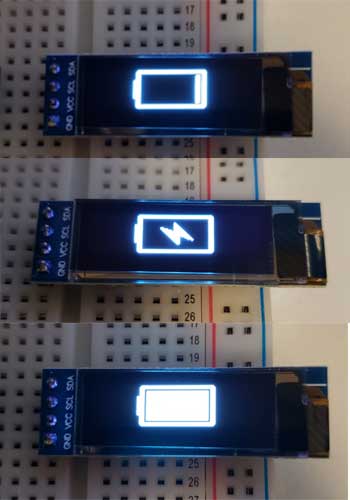
这里提供一个绘制电池状态的示例,带有三种状态:电量低、充电中、满电。
效果:

示例:
[mw_shl_code=arduino,true]#include <U8g2lib.h>
#include <Wire.h>
U8G2_SSD1306_128X32_UNIVISION_1_HW_I2C u8g2(U8G2_R0, U8X8_PIN_NONE, SCL, SDA);
void setup()
{
u8g2.begin();
u8g2.setFlipMode(0);
}
void loop()
{
u8g2.firstPage();
do
{
drawBattery(35, 1);
drawBatterycharging(35, 1);
// drawBatteryFull(35, 1);
// drawBatteryLow(35, 1);
} while (u8g2.nextPage());
}
void drawBattery(int x, int y)
{
u8g2.drawBox(x, y + 8, 3, 14);
u8g2.drawLine(x + 2, y + 1, x + 2, y + 28);
u8g2.drawFrame(x + 3, y, 54, 30);
u8g2.drawFrame(x + 4, y + 1, 52, 28);
u8g2.drawLine(x + 57, y + 1, x + 57, y + 28);
}
void drawBatteryFull(int x, int y)
{
u8g2.drawBox(x + 7, y + 4, 46, 22);
}
void drawBatterycharging(int x, int y)
{
int x1 = x + 18;
int y1 = y + 5;
u8g2.drawTriangle(x1, y1 + 4, x1 + 14, y1 + 18, x1 + 15, y1 + 9);
u8g2.drawTriangle(x1 + 10, y1, x1 + 26, y1 + 15, x1 + 11, y1 + 9);
}
void drawBatteryLow(int x, int y)
{
u8g2.drawBox(x + 50, y + 4, 3, 22);
}[/mw_shl_code]
|
|