|
|
本帖最后由 hunter1217 于 2017-5-4 20:46 编辑
一、硬件(DERobot免费提供)
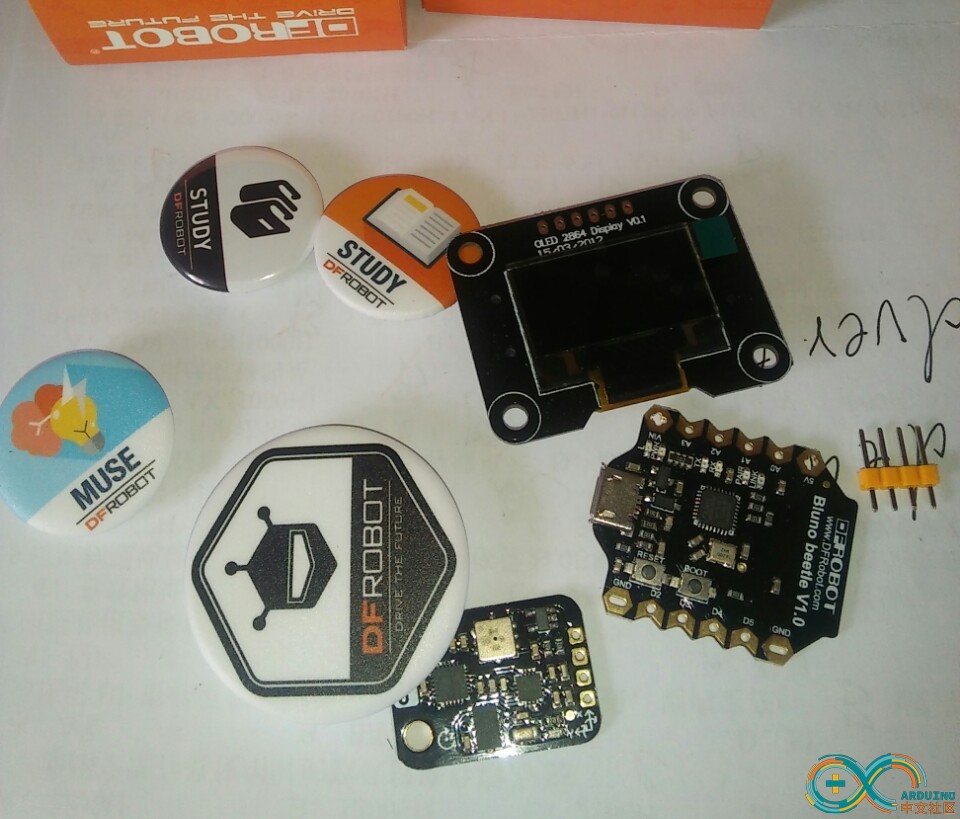
1. OLED 2864 display module
OLED 2864 display module是一款无需背光源自发光显示模块。显示尺寸0.96寸,驱动IC:SSD1306。该模块与arduino通过IIC接接口进行通信。
是本次的测评数据的显示模块。
2. 10Dof sensor
10自由度惯性测量单元是一个电子设备,集成
- Adxl345加速度计
- ITG3200陀螺仪
- HMC5883L罗盘
- BMP085压力传感器
IMU应用广泛,这里就不在一一举例,本次测评数据的采集就是依靠此IMU。
3.Bluno Beetle 是一款只有SD卡大小,集成蓝牙4.0功能的Arduino主控器。它是可穿戴电子应用的又一突破,让DIY用户在项目设计中有了更多选择。它与DFRobot畅销的Bluno系列主控完全兼容,可以通过Micro USB接口可直接下载、调试程序,无需编程器,同时也支持蓝牙远程更新Arduino程序。V形大尺寸镀金IO口,体积小巧,可将将导线拧于其上,缝 制在衣服上,不焊接也可以使用。是可穿戴设备的不二之选。Bluno Beetle 是本次测评的主控制器。
二、方案设想及实现(方案框图由图片形式给出)
硬件实现框图
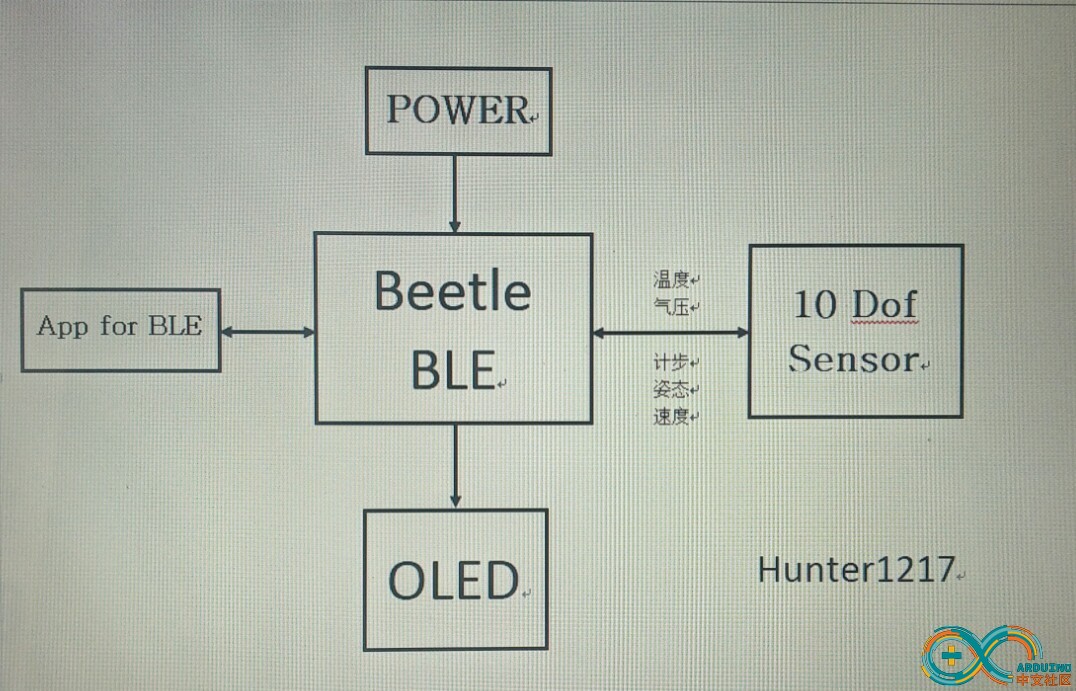
1.数据的采集
10 自由度惯性导航模块集成加速度传感器ADXL345可用于检测人体加速度的变化,实现计步的功能(人在行走时身体的加速度会有周期性的变化,人的手臂、腰部、腿部及脚部都会有相应的运动,有运动必会有加速度的变化,且会在某些点出现峰值,检测每一步的峰值可得到步数,从而实现计步的功能。用加速度计采集采集人体的三轴加速度数据,进行数据处理得到步数),BMP085压力温度传感器可以实现温度与气压数据的采集。从而完成了本次测评所需要的原始数据采集!注:本次测评没有用到10自由度IMU的磁罗盘HMC5883L与ITG3200陀螺仪。
2.功能实现
(1)计步功能:由加速度计采集加速度数据的变化,数据输入到Bluno Beetle进行处理,实现计步的功能。
(2)温度、气压显示:BMP085气压温度传感器采集到的数据经处理输出到OLED2864显示屏上。(由当前的气压数据可以间接的求出海拔高度,但是影响气压的因素较多,使用此方法计算海拔本就是一种不太好的方法,故没有进行海拔参数的计算)
(3)OLED显示:本次使用的OLED2864显示模块使用的是u8glib库,此库可以在ArduinoIDE库管理中加载,或者在咱们社区找到,这里就不再上传。
(4)APP:blynk是一款比较容易上手且功能全面的手机APP,专为物联网平台设计,它可以显示传感器数据,存储数据,同时也能通过低功耗蓝牙及WIFI远程控制硬件,这个APP我刚刚开始玩,只进行了简单的蓝牙连接以及数据显示,社区有的玩家对blynk了解运用比较透彻,我也是看其他人玩可之后带着好奇心尝试了一下。(可以Bluno Beetle的BLE进行通信。响应速度较为可观。以后我会慢慢探索这个奇妙的APP blynk)
3.程序设计
三、调试结果
1.模块焊接:
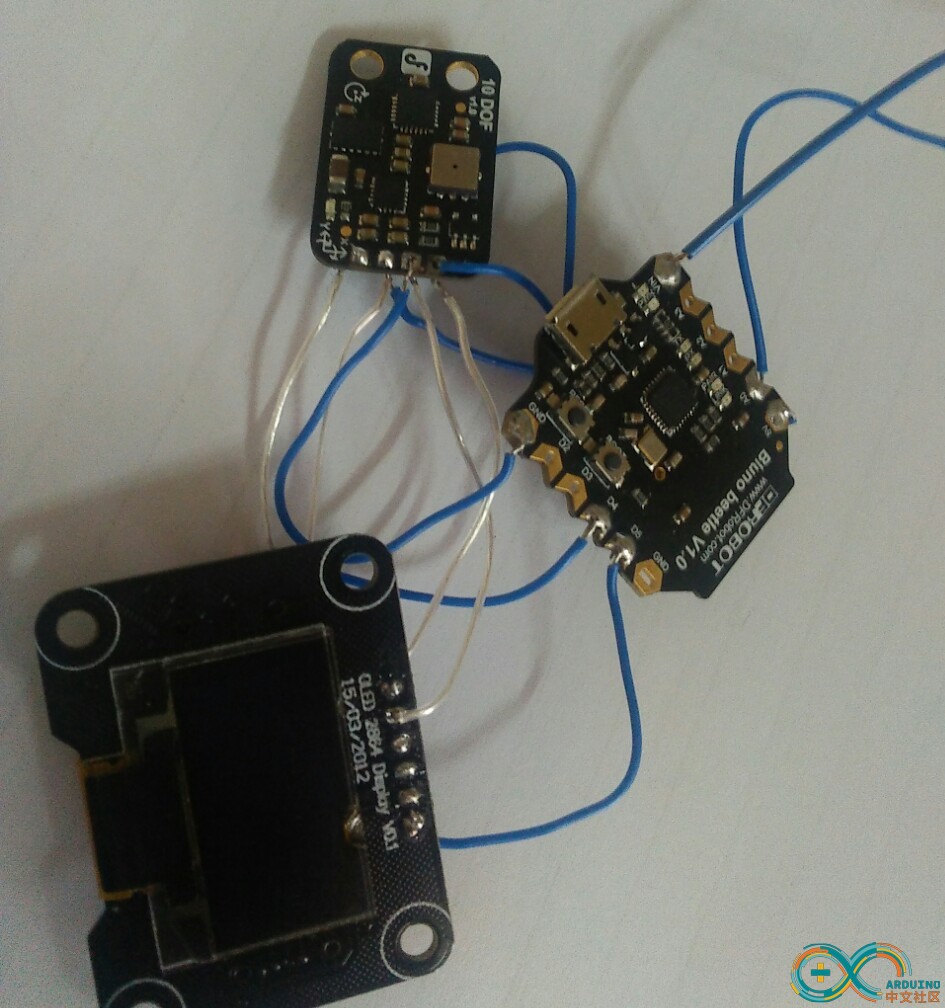
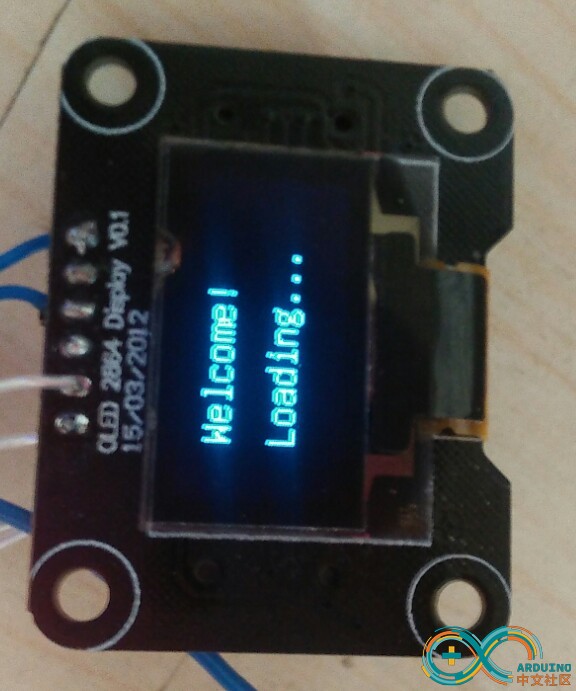
2.开机界面显示:
开机界面
3.早期调试结果显示:
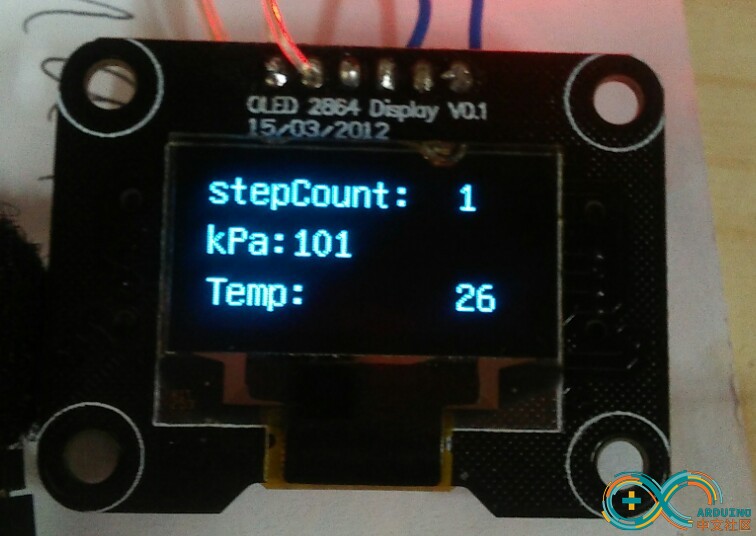 此时的调试实现了计步、气压、温度数据的显示。
4.中后期调试结果:
早期调试
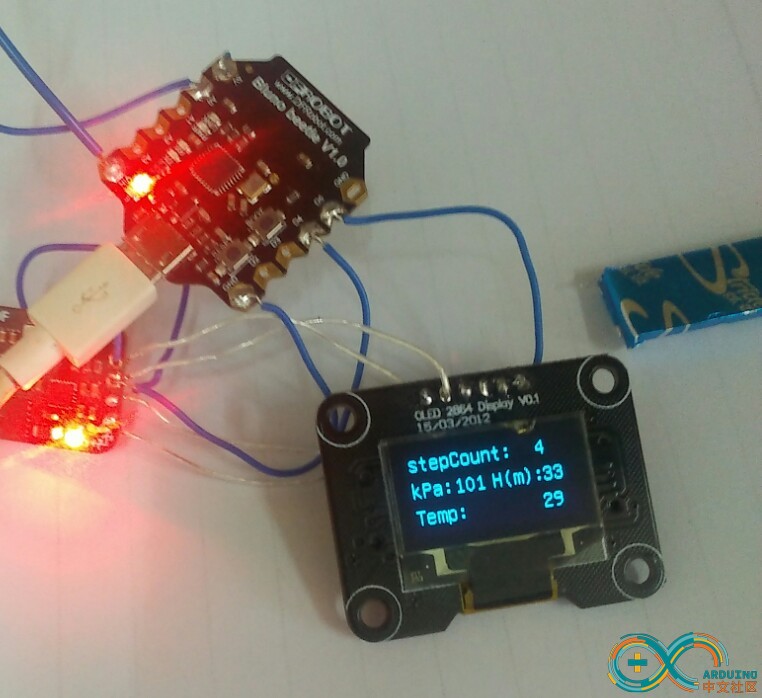
此时的测试把根据气压计算得到的海拔数据显示在了OLED显示屏上,但是精度太差,还不稳定,受天气环境影响较大,后期又把此数据裁剪掉了。
四、程序
[mw_shl_code=cpp,true]#include "pedometer.h"
#include <ADXL345.h>
#include <Wire.h>
#include "U8glib.h"
const int RES = 4; //OLED reset pin
int DC = 5;
U8GLIB_SSD1306_128X64 u8g(U8G_I2C_OPT_NONE|U8G_I2C_OPT_DEV_0); //OLED驱动
Pedometer pedometer;//set Pedometer object
float temp;
short temperature;
long pressure;
int lastStepCount=0;
int stepCount=0;
void mainFun(){
temperature = bmp085GetTemperature(bmp085ReadUT());
temp= temperature*0.1;
pressure=bmp085GetPressure(bmp085ReadUP())/1000.0;
pedometer.stepCalc();//steps
stepCount=pedometer.stepCount;
if(stepCount!=lastStepCount){//if stepCount has changed
char jibu[4];
char Temp[5];
char Pa[4];
itoa(temp,Temp,10);
itoa(stepCount,jibu,10);
itoa(pressure,Pa,10);
u8g.firstPage();
do {
u8g.setFont(u8g_font_unifont);//设置OLED字号大小
u8g.drawStr( 2, 15, "stepCount:");//在指定位置显示
u8g.drawStr( 100, 15, jibu);
u8g.drawStr(2,35,"kPa:");
u8g.drawStr(100,35,Pa);
u8g.drawStr( 2, 55, "Temp:");
u8g.drawStr( 20, 55, Temp);
}while(u8g.nextPage());
}
void setup(){
Wire.begin();
pedometer.init();
bmp085Calibration(); // init barometric(Pa) pressure sensor
pinMode(RES,OUTPUT);//RES
pinMode(DC,OUTPUT);//D/C#
digitalWrite(DC,LOW);
digitalWrite(RES,HIGH);
delay(1000);
digitalWrite(RES,LOW);
delay(1000);
digitalWrite(RES,HIGH);
u8g.firstPage();
do {
u8g.setFont(u8g_font_unifont);
u8g.drawStr(20,20,"Welcome!");
u8g.drawStr(20,45,"Loading...");
}while(u8g.nextPage());
delay(5000);
}
void loop()
{
mainFun();
}
[/mw_shl_code]
[kenrobot_code]/*
* 10自由度IMU气压温度传感器BMP085程序
*/
#define BMP085_ADDRESS 0x77 // I2C address of BMP085
const unsigned char OSS = 0; // Oversampling Setting
// Calibration values
int ac1;
int ac2;
int ac3;
unsigned int ac4;
unsigned int ac5;
unsigned int ac6;
int b1;
int b2;
int mb;
int mc;
int md;
// b5 is calculated in bmp085GetTemperature(...), this variable is also used in bmp085GetPressure(...)
// so ...Temperature(...) must be called before ...Pressure(...).
long b5;
// Stores all of the bmp085's calibration values into global variables
// Calibration values are required to calculate temp and pressure
// This function should be called at the beginning of the program
void bmp085Calibration()
{
ac1 = bmp085ReadInt(0xAA);
ac2 = bmp085ReadInt(0xAC);
ac3 = bmp085ReadInt(0xAE);
ac4 = bmp085ReadInt(0xB0);
ac5 = bmp085ReadInt(0xB2);
ac6 = bmp085ReadInt(0xB4);
b1 = bmp085ReadInt(0xB6);
b2 = bmp085ReadInt(0xB8);
mb = bmp085ReadInt(0xBA);
mc = bmp085ReadInt(0xBC);
md = bmp085ReadInt(0xBE);
}
// Calculate temperature given ut.
// Value returned will be in units of 0.1 deg C
short bmp085GetTemperature(unsigned int ut)
{
long x1, x2;
x1 = (((long)ut - (long)ac6)*(long)ac5) >> 15;
x2 = ((long)mc << 11)/(x1 + md);
b5 = x1 + x2;
return ((b5 + 8)>>4);
}
// Calculate pressure given up
// calibration values must be known
// b5 is also required so bmp085GetTemperature(...) must be called first.
// Value returned will be pressure in units of Pa.
long bmp085GetPressure(unsigned long up)
{
long x1, x2, x3, b3, b6, p;
unsigned long b4, b7;
b6 = b5 - 4000;
// Calculate B3
x1 = (b2 * (b6 * b6)>>12)>>11;
x2 = (ac2 * b6)>>11;
x3 = x1 + x2;
b3 = (((((long)ac1)*4 + x3)<<OSS) + 2)>>2;
// Calculate B4
x1 = (ac3 * b6)>>13;
x2 = (b1 * ((b6 * b6)>>12))>>16;
x3 = ((x1 + x2) + 2)>>2;
b4 = (ac4 * (unsigned long)(x3 + 32768))>>15;
b7 = ((unsigned long)(up - b3) * (50000>>OSS));
if (b7 < 0x80000000)
p = (b7<<1)/b4;
else
p = (b7/b4)<<1;
x1 = (p>>8) * (p>>8);
x1 = (x1 * 3038)>>16;
x2 = (-7357 * p)>>16;
p += (x1 + x2 + 3791)>>4;
return p;
}
// Read 1 byte from the BMP085 at 'address'
char bmp085Read(unsigned char address)
{
unsigned char data;
Wire.beginTransmission(BMP085_ADDRESS);
Wire.write(address);
Wire.endTransmission();
Wire.requestFrom(BMP085_ADDRESS, 1);
while(!Wire.available())
;
return Wire.read();
}
// Read 2 bytes from the BMP085
// First byte will be from 'address'
// Second byte will be from 'address'+1
int bmp085ReadInt(unsigned char address)
{
unsigned char msb, lsb;
Wire.beginTransmission(BMP085_ADDRESS);
Wire.write(address);
Wire.endTransmission();
Wire.requestFrom(BMP085_ADDRESS, 2);
while(Wire.available()<2)
;
msb = Wire.read();
lsb = Wire.read();
return (int) msb<<8 | lsb;
}
// Read the uncompensated temperature value
unsigned int bmp085ReadUT()
{
unsigned int ut;
// Write 0x2E into Register 0xF4
// This requests a temperature reading
Wire.beginTransmission(BMP085_ADDRESS);
Wire.write(0xF4);
Wire.write(0x2E);
Wire.endTransmission();
// Wait at least 4.5ms
delay(5);
// Read two bytes from registers 0xF6 and 0xF7
ut = bmp085ReadInt(0xF6);
return ut;
}
// Read the uncompensated pressure value
unsigned long bmp085ReadUP()
{
unsigned char msb, lsb, xlsb;
unsigned long up = 0;
// Write 0x34+(OSS<<6) into register 0xF4
// Request a pressure reading w/ oversampling setting
Wire.beginTransmission(BMP085_ADDRESS);
Wire.write(0xF4);
Wire.write(0x34 + (OSS<<6));
Wire.endTransmission();
// Wait for conversion, delay time dependent on OSS
delay(2 + (3<<OSS));
// Read register 0xF6 (MSB), 0xF7 (LSB), and 0xF8 (XLSB)
Wire.beginTransmission(BMP085_ADDRESS);
Wire.write(0xF6);
Wire.endTransmission();
Wire.requestFrom(BMP085_ADDRESS, 3);
// Wait for data to become available
while(Wire.available() < 3)
;
msb = Wire.read();
lsb = Wire.read();
xlsb = Wire.read();
up = (((unsigned long) msb << 16) | ((unsigned long) lsb << 8) | (unsigned long) xlsb) >> (8-OSS);
return up;
}
[/kenrobot_code]
五、测试心得
看到DFRobot的产品的的时候,确实眼前一亮!我是第一次用Arduino开发一个完整的作品,之前都是玩单个的传感器!对自己来说也是个挑战,感谢DFrobot提供这次机会。这次测评,硬件都是很完整的模块,故开发的难点都在程序的调试上。我很喜欢这次的OLED2864显示屏,小巧漂亮,显示内容清晰,程控方便!还有不得不说的10自由度IMU,性能很好,集成度高,遗憾的是自己只使用到了其中的ADXL345、BMP085,剩余两个陀螺仪和磁罗盘我会慢慢摸索的。再有就是Bluno Beetle,这个小巧的开发板挺让人喜欢的,集成蓝牙4.0模块,可以与手机app进行通信。
关于自己作品的进度,目前实现了功能,外壳封装还没有完成,时间比较紧,很是抱歉!但这不是我最终的进度,我会慢慢跟进,争取做一个完整的作品!做一个让自己满意的作品!用arduino开发最大的体会就是开源给我带来的感动,让我可以站在别人的肩膀上玩电子开发!支持开源!文笔不好,请多担待啊!
|
-
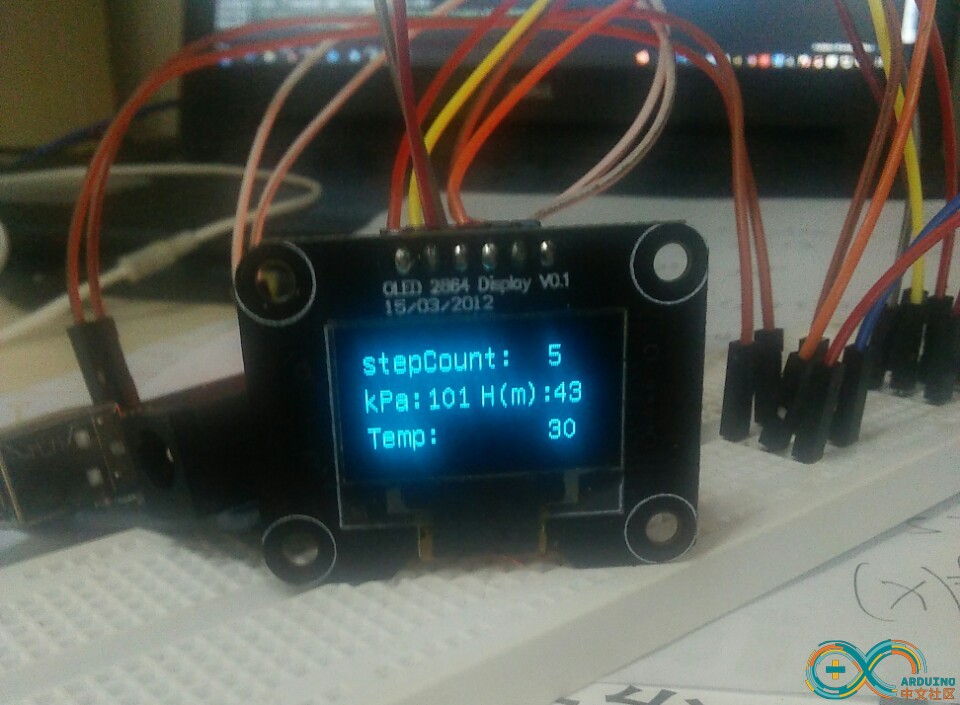
调试效果图
|