本帖最后由 土豆变薯条 于 2013-12-11 17:53 编辑
pcDuino有计算能力来进行计算机视觉,这就让很多在Arduino 上不可能的项目可以在pcDuino上实现。 我们可以把计算机视觉这一非常强大的技术用在我们的项目中。 在这章,我们来看怎么安装和使用SimpleCV和OpenCV。
一:SimpleCV安装和例子
在我们开始动手之前,我们要确保手头有一个 UVC 兼容的USB摄像头。
下面为安装SimpleCV的步骤:
$sudo apt-get install ipython python-opencv python-scipy
python-numpy python-setuptools python-pip
$sudo pip install https://github.com/ingenuitas/SimpleCV/zipball/master
$sudo apt-get install python-pygame
$sudo apt-get install python-imaging
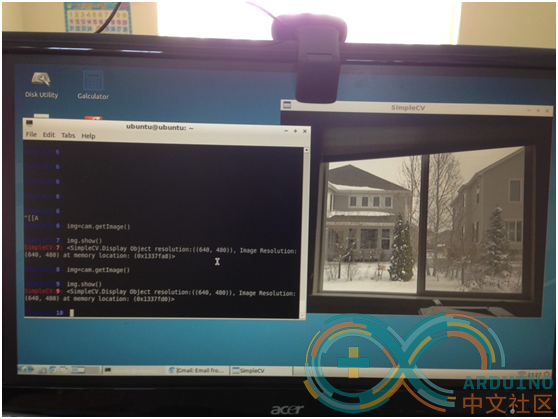
在终端里面输入 “$simpleCV” 就可以启动simpleCV. simpleCV是一个交互的命令解释器。 我们可以输入命令来执行:
ubuntu@ubuntu:~$ simplecv
+———————————————————–+
SimpleCV 1.3.0 [interactive shell] - http://simplecv.org
+———————————————————–+
Commands:
"exit()" or press "Ctrl+ D" to exit the shell
"clear" to clear the shell screen
"tutorial" to begin the SimpleCV interactive tutorial
"example" gives a list of examples you can run
"forums" will launch a web browser for the help forums
"walkthrough" will launch a web browser with a walkthrough
Usage:
dot complete works to show library
for example: Image().save("/tmp/test.jpg") will dot complete
just by touching TAB after typing Image().
Documentation:
help(Image), ?Image, Image?, or Image()? all do the same
"docs" will launch webbrowser showing documentation
SimpleCV:1> cam=Camera()
VIDIOC_QUERYMENU: Invalid argument
VIDIOC_QUERYMENU: Invalid argument
VIDIOC_QUERYMENU: Invalid argument
VIDIOC_QUERYMENU: Invalid argument
VIDIOC_QUERYMENU: Invalid argument
VIDIOC_QUERYMENU: Invalid argument
VIDIOC_QUERYMENU: Invalid argument
SimpleCV:2> img=cam.getImage()
SimpleCV:3> img.show()
SimpleCV:5:
以下为命令执行的结果:

二:OpenCV 安装和例子
OpenCV 是个开源的计算机视觉软件包。在这里我们详细的介绍如何安装OpenCV Python版本到pcDuino上面。 并且给出了两个例子,一个例子用来通过USB 摄像头来获取图形,另外一个例子通过OpenCV来做人脸识别。
安装步骤:
$ sudo apt-get -y install build-essential cmake cmake-qt-gui pkg-config libpng12-0 libpng12-dev libpng++-dev libpng3 libpnglite-dev zlib1g-dbg zlib1g zlib1g-dev pngtools libtiff4-dev libtiff4 libtiffxx0c2 libtiff-tools
$sudo apt-get -y install libjpeg8 libjpeg8-dev libjpeg8-dbg libjpeg-progs ffmpeg libavcodec-dev libavcodec53 libavformat53 libavformat-dev libgstreamer0.10-0-dbg libgstreamer0.10-0 libgstreamer0.10-dev libxine1-ffmpeg libxine-dev libxine1-bin libunicap2 libunicap2-dev libdc1394-22-dev libdc1394-22 libdc1394-utils swig libv4l-0 libv4l-dev python-numpy libpython2.6 python2.6-dev libgtk2.0-dev pkg-config
$sudo apt-get install libopencv-dev python-opencv
$sudo apt-get install python-dev
$sudo ln -s /usr/lib/arm-linux-gnueabihf/libjpeg.so /usr/lib
$sudo ln -s /usr/lib/arm-linux-gnueabihf/libfreetype.so /usr/lib
$sudo ln -s /usr/lib/arm-linux-gnueabihf/libz.so /usr/lib
$sudo easy_install PIL
$sudo pip install -v PIL
例子1: 用OpenCV通过USB摄像头来抓图像:
#!/Users/brent/.virtualenvs/lumber/bin/python
import cv
cv.NamedWindow("w1", cv.CV_WINDOW_AUTOSIZE)
camera_index = 0
capture = cv.CaptureFromCAM(camera_index)
gx = gy = 1
grayscale = blur = canny = False
def repeat():
global capture #declare as globals since we are assigning to them now
global camera_index
global gx, gy, grayscale, canny, blur
frame = cv.QueryFrame(capture)
# import pdb; pdb.set_trace()
if grayscale:
gray = cv.CreateImage(cv.GetSize(frame), frame.depth, 1)
cv.CvtColor(frame, gray, cv.CV_RGB2GRAY)
frame = gray
if blur:
g = cv.CreateImage(cv.GetSize(frame), cv.IPL_DEPTH_8U, frame.channels)
cv.Smooth(frame, g, cv.CV_GAUSSIAN, gx, gy)
frame = g
if grayscale and canny:
c = cv.CreateImage(cv.GetSize(frame), frame.depth, frame.channels)
cv.Canny(frame, c, 10, 100, 3)
frame = c
cv.ShowImage("w1", frame)
c = cv.WaitKey(10)
if c==ord('='): #in "n" key is pressed while the popup window is in focus
gx += 2
gy += 2
elif c == ord('-'):
gx = max(1, gx-2)
gy = max(1, gy-2)
elif c == ord('x'):
gx += 2
elif c == ord('X'):
gx = max(1, gx-2)
elif c == ord('q'):
exit(0)
elif c == ord('b'):
blur = not blur
elif c == ord('g'):
grayscale = not grayscale
elif c == ord('c'):
canny = not canny
while True:
repeat()
例子二: 人脸识别
输入图像:

|