|
|
[md]介绍在树莓派上使用python和qt开发一个camera程序,开发工具使用PyCharm和QtCreator,开发方式为Pyside2+QML。
#### 1、新建项目
##### 1.1、新建工程
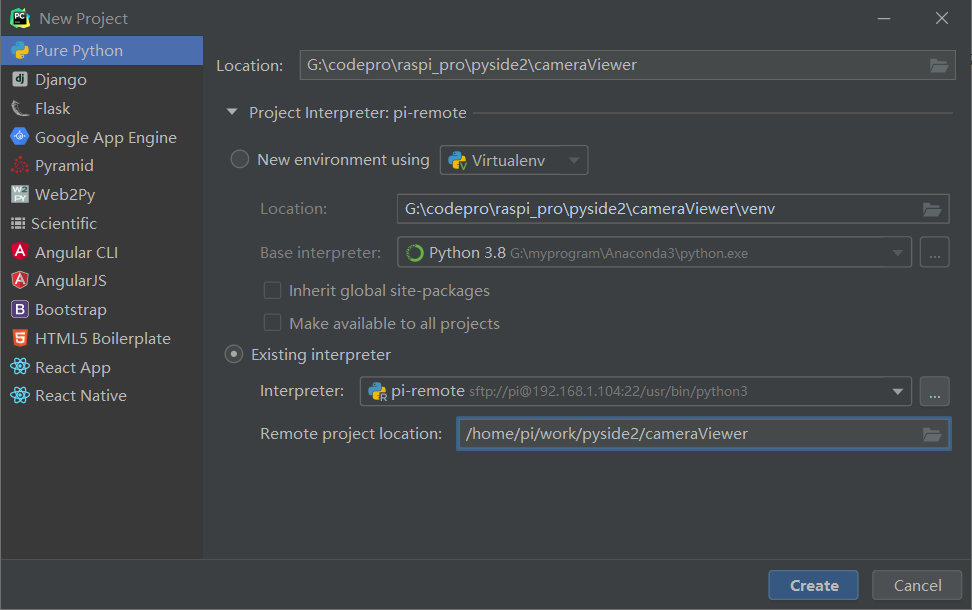
打开PyCharm,新建工程cameraViewer,如下:

##### 1.2、添加python主程序
在项目中新建main.py 主程序如下:
```python
import os
import sys
from pathlib import Path
from PySide2.QtCore import Qt, QObject, Slot, QCoreApplication
from PySide2.QtQml import QQmlApplicationEngine
from PySide2.QtWidgets import QApplication
class Controler(QObject):
def __init__(self):
super().__init__()
@Slot()
def exit(self):
sys.exit()
if __name__=='__main__':
a = QApplication(sys.argv)
a.setOverrideCursor(Qt.BlankCursor)
engine = QQmlApplicationEngine()
controler = Controler()
context = engine.rootContext()
context.setContextProperty("_Controler",controler)
engine.load(os.fspath(Path(__file__).resolve().parent / "ui/camera.qml"))
if not engine.rootObjects():
sys.exit(-1)
sys.exit(a.exec_())
```
主程序中,只用于显示qml界面,并添加了一个退出程序的函数供界面调用。
##### 1.3、添加界面文件
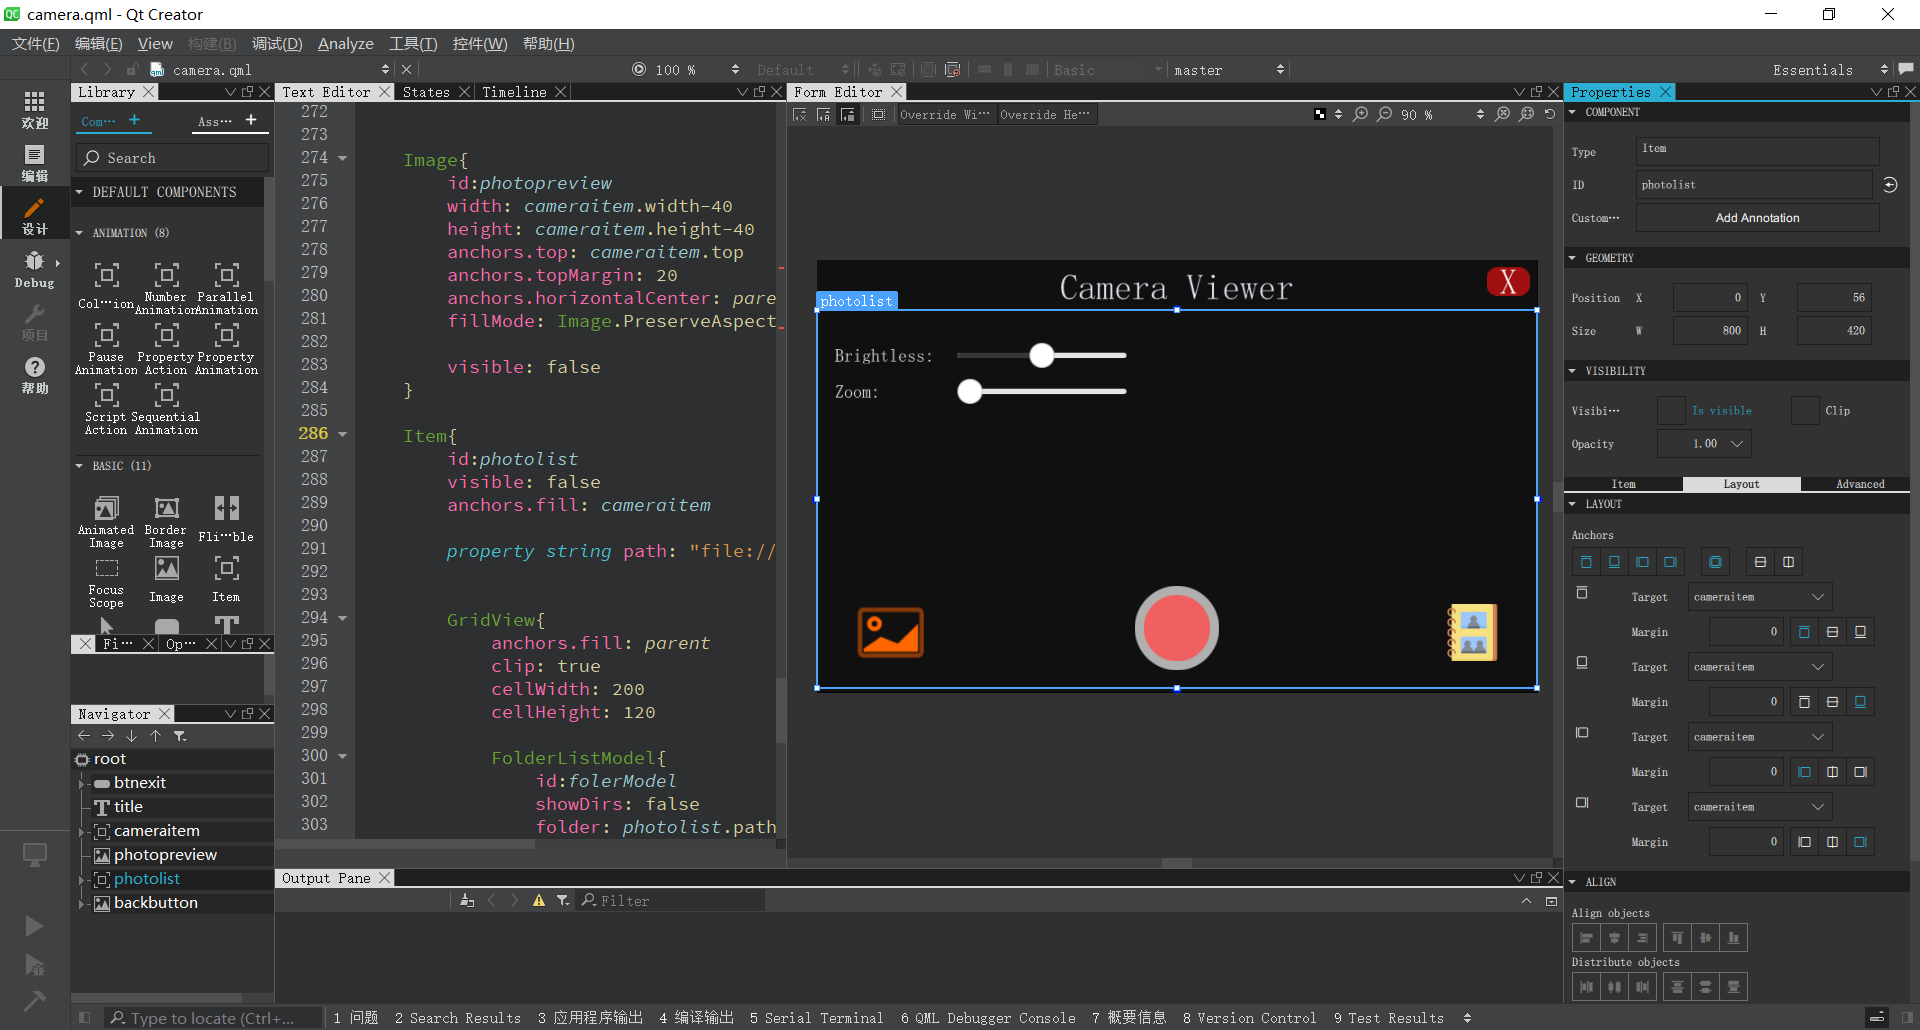
- 在项目中添加ui文件夹,并在ui文件夹下新建camera.qml文件,界面如下:

- 主要参考代码如下:
```js
Camera{
id:camera
viewfinder
{
resolution: Qt.size(800, 480)
maximumFrameRate: 30
}
imageProcessing{
brightness: cameraitem.brightless
whiteBalanceMode: CameraImageProcessing.WhiteBalanceFlash
}
exposure {
exposureCompensation: -1.0
exposureMode: Camera.ExposurePortrait
}
flash.mode: Camera.FlashRedEyeReduction
imageCapture{
id:cameraCaptureImage
onImageCaptured: {
photopreview.source = preview
console.log("captured image:",preview)
}
}
digitalZoom: sliderZoom.value
}
VideoOutput{
id:viewer
anchors.fill: parent
source: camera
autoOrientation: true
focus: visible
fillMode: VideoOutput.PreserveAspectCrop
}
```
主要使用了Camera和VideoOutput组件来进行摄像头操作,其他部分只是按键等操作控件使用。
- 使用camera组件的imageCapture来抓取当前的图像,默认图片保存在 树莓派路径:/home/pi/Pictures/ 下。
#### 2、执行程序
##### 2.1、上传程序到树莓派
在工程上右键将这个项目文件上传到树莓派中:

##### 2.2、执行程序
上传后,在树莓派对应文件夹中,执行如下命令执行程序:
```bash
python3 main.py
```
> 如果出现类似:no service found for - “org.qt-project.qt.camera” 这样的错误,需要安装对应的库:qml-module-qtmultimedia python3-pyside2.qtmultimedia libqt5multimedia5-plugins
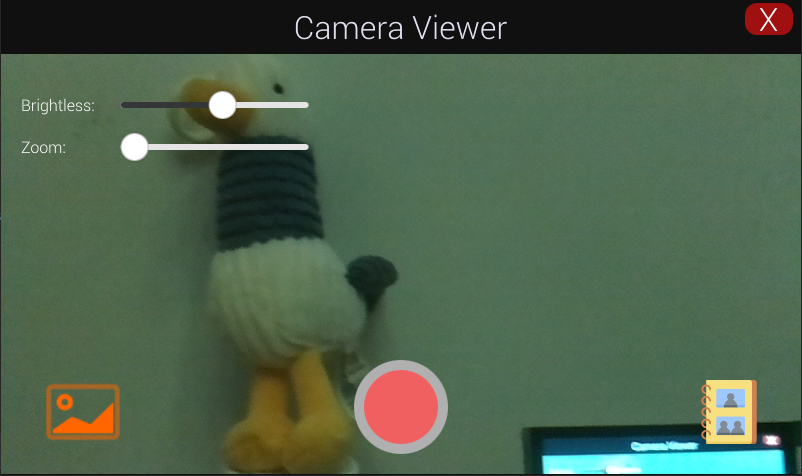
执行后可以看到显示如下:

可以通过 Brightless来调节亮度,通过Zoom来调节焦距,点击下面的红色按钮进行照相,然后左边按钮为查看当前照相的图片,右边为查看所有的图片文件。
完整代码:[https://github.com/makerinchina-iot/raspberry_pyside_notes](https://github.com/makerinchina-iot/raspberry_pyside_notes)
视频演示:
<iframe src="//player.bilibili.com/player.html?aid=420690706&bvid=BV1f3411276o&cid=412930511&page=1" scrolling="no" border="0" frameborder="no" framespacing="0" allowfullscreen="true" style="width: 100%; height: 500px; max-width: 100%;align:center; padding:20px 0;" > </iframe>[/md]
|
-

|