|
|
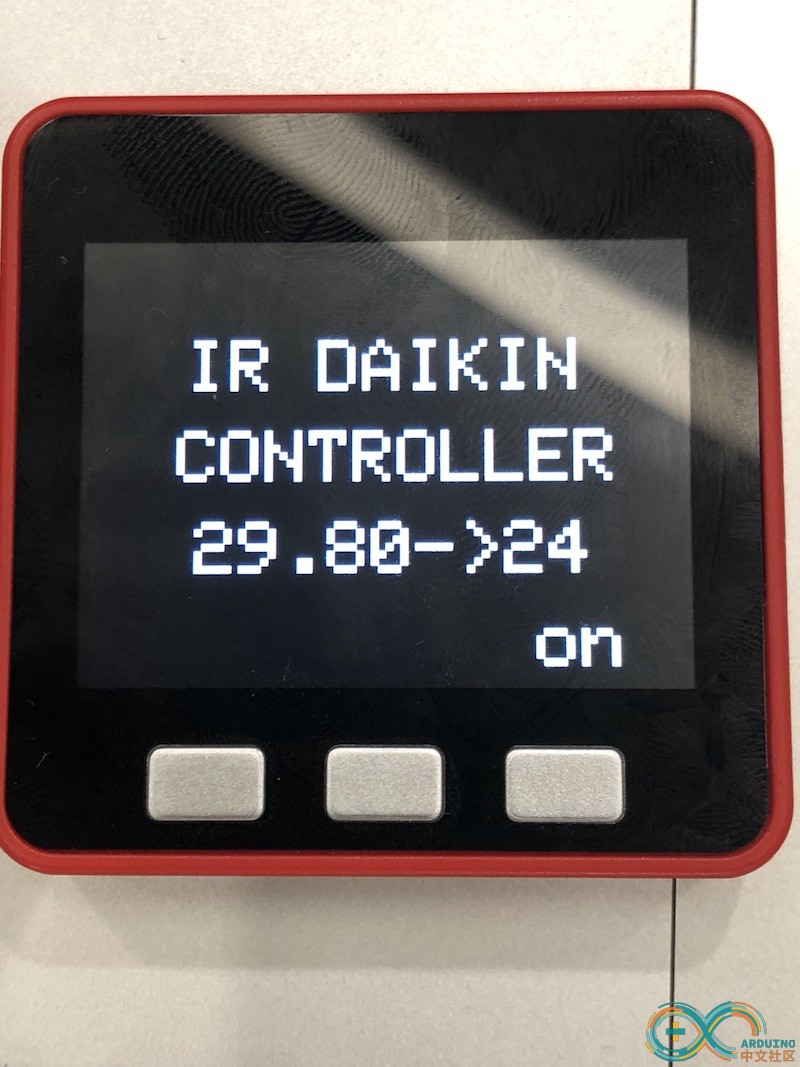
本项目通过使用DHT12和IR自动控制空调启停,也可通过手动进行控制,温度可调。在使用下列示例前请确保IRremoteESP8266库已经更新到最新版本,新版加入部分品牌空调的遥控编码,具体支持型号可通过库自带示例串口查看能否显示出型号,也可通过每个ir_xxx.h文件查看,示例中控制的是大金空调。长按A键实现屏幕休眠与唤醒,短按A键温度减少,长按C键手动控制开关,短按C键温度增加,短按B键发送遥控信号,温度大于29.5自动打开空调

[mw_shl_code=arduino,true]#include <Arduino.h>
#include <M5Stack.h>
#include "DHT12.h"
#include <Wire.h> //The DHT12 uses I2C comunication.
#include <Adafruit_Sensor.h>
#include <Adafruit_BMP280.h>
// IR libraries
#include <IRremoteESP8266.h>
#include <IRsend.h>
#include <ir_Daikin.h>
// Functions
void main_display();
void temp_display();
void ac_setup();
long time_abs=0;
long time_offset=3630000 *2;
float tmp = 0;
bool temp_flag= false;
float hum = 0;
float pressure = 0;
// AC variables
String ac_power = "on";
int ac_temp = 25;
bool screen_on = true;
// IR setup
const uint16_t kIrLed = 26; //4; // ESP8266 GPIO pin to use. Recommended: 4 (D2).
IRDaikinESP ac(kIrLed); // Set the GPIO to be used to sending the message
// Env setup
DHT12 dht12;
Adafruit_BMP280 bme;
void setup() {
time_abs=millis();
M5.begin();
Wire.begin();
while (!bme.begin(0x76)){
Serial.println("Could not find a valid BMP280 sensor, check wiring!");
M5.Lcd.println("Could not find a valid BMP280 sensor, check wiring!");
}
Serial.begin(115200);
//IR setup
ac.begin();
main_display();
delay(3000);
ac_setup();
}
void loop() {
M5.update();
//Env readings
tmp = dht12.readTemperature();
temp_display();
// hum = dht12.readHumidity();
// pressure = bme.readPressure();
// Serial.printf("Temperatura: %2.2f*C Humedad: %0.2f%% \r\n", tmp, hum);
if (M5.BtnC.pressedFor(1500)) {
if (ac_power == "on"){
ac_power = "off";
main_display();
}
else{
ac_power = "on";
main_display();
}
delay(500);
}
else if (M5.BtnA.pressedFor(1500)) {
if (screen_on == true){
M5.Lcd.sleep();
M5.Lcd.setBrightness(0);
screen_on = false;
}
else{
M5.Lcd.wakeup();
M5.Lcd.setBrightness(127);
screen_on = true;
}
delay(500);
}
else if (M5.BtnB.wasPressed()) {
ac_setup();
}
else if(M5.BtnA.wasPressed()){
if (ac_temp >10){
ac_temp --;
}
ac.setTemp(ac_temp);
main_display();
}
else if(M5.BtnC.wasPressed()){
if (ac_temp <32){
ac_temp ++;
}
ac.setTemp(ac_temp);
main_display();
}
if (millis()>=(time_abs+time_offset)){
time_abs=millis();
ac.setCurrentTime(22 * 60 + 0);
ac.enableOffTimer(22 * 60 + 30);
ac.enableOnTimer(23 * 60 + 30);
// Now send the IR signal.
#if SEND_DAIKIN
ac.send();
#endif // SEND_DAIKIN
}
if (tmp>=29.5 && temp_flag == false){
delay(5000);
temp_flag = true;
ac_power = "on";
time_abs=millis();
ac_setup();
// Now send the IR signal.
#if SEND_DAIKIN
ac.send();
#endif // SEND_DAIKIN
Serial.println("DONE");
}
else if (tmp<=28.5 && temp_flag == true){
temp_flag = false;
}
delay(100);
}
void ac_setup(){
M5.Lcd.setCursor(45, 150);
M5.Lcd.println("\nSending");
// Set up what we want to send. See ir_Daikin.cpp for all the options.
if (ac_power == "on"){
ac.on();
}
else{
ac.off();
}
ac.setFan(kDaikinFanQuiet);
ac.setMode(kDaikinCool);
ac.setTemp(ac_temp);
ac.setSwingVertical(false);
ac.setSwingHorizontal(false);
// half hour working
ac.setCurrentTime(22 * 60 + 0);
ac.enableOffTimer(22 * 60 + 30);
ac.enableOnTimer(23 * 60 + 30);
// Now send the IR signal.
#if SEND_DAIKIN
ac.send();
#endif // SEND_DAIKIN
delay(1000);
M5.Lcd.clearDisplay(ILI9341_BLACK);
main_display();
}
void main_display(){
M5.Lcd.clearDisplay(ILI9341_BLACK);
M5.Lcd.setTextSize(4);
M5.Lcd.setCursor(50, 50);
M5.Lcd.println("IR DAIKIN");
M5.Lcd.setCursor(45, 100);
M5.Lcd.println("CONTROLLER ");
M5.Lcd.setCursor(135, 150);
temp_display(); //Temp display
M5.Lcd.setCursor(240, 200);
M5.Lcd.println(ac_power);
}
void temp_display()
{
M5.Lcd.setCursor(55, 150);
M5.Lcd.print(tmp);
M5.Lcd.print("->");
M5.Lcd.println(ac.getTemp());
// M5.Lcd.printf("Temp: %2.1f", tmp);
}[/mw_shl_code]
|
|