本帖最后由 是少翔啊 于 2019-12-3 10:55 编辑
应用简介
在日常生活中,人们经常会去超市或是便利店购买物品,随着近年来"无人超市"概念的的逐渐升温。对于消费购买流程的简化,和人力资源的节省成了重头戏。在本应用将着重模拟实现无人超市中商品添加与付款环节。同时涉及多个方面内容,致力实现应用的趣味性和挑战性。
材料清单
Scake Kit(电子秤) x1 M5GO x1 M5StickV x1 SD Card x1 商品识别物模型 Grove连接线 x2 铝型材框架/亚克力面板等结构件
功能原理
前端部分
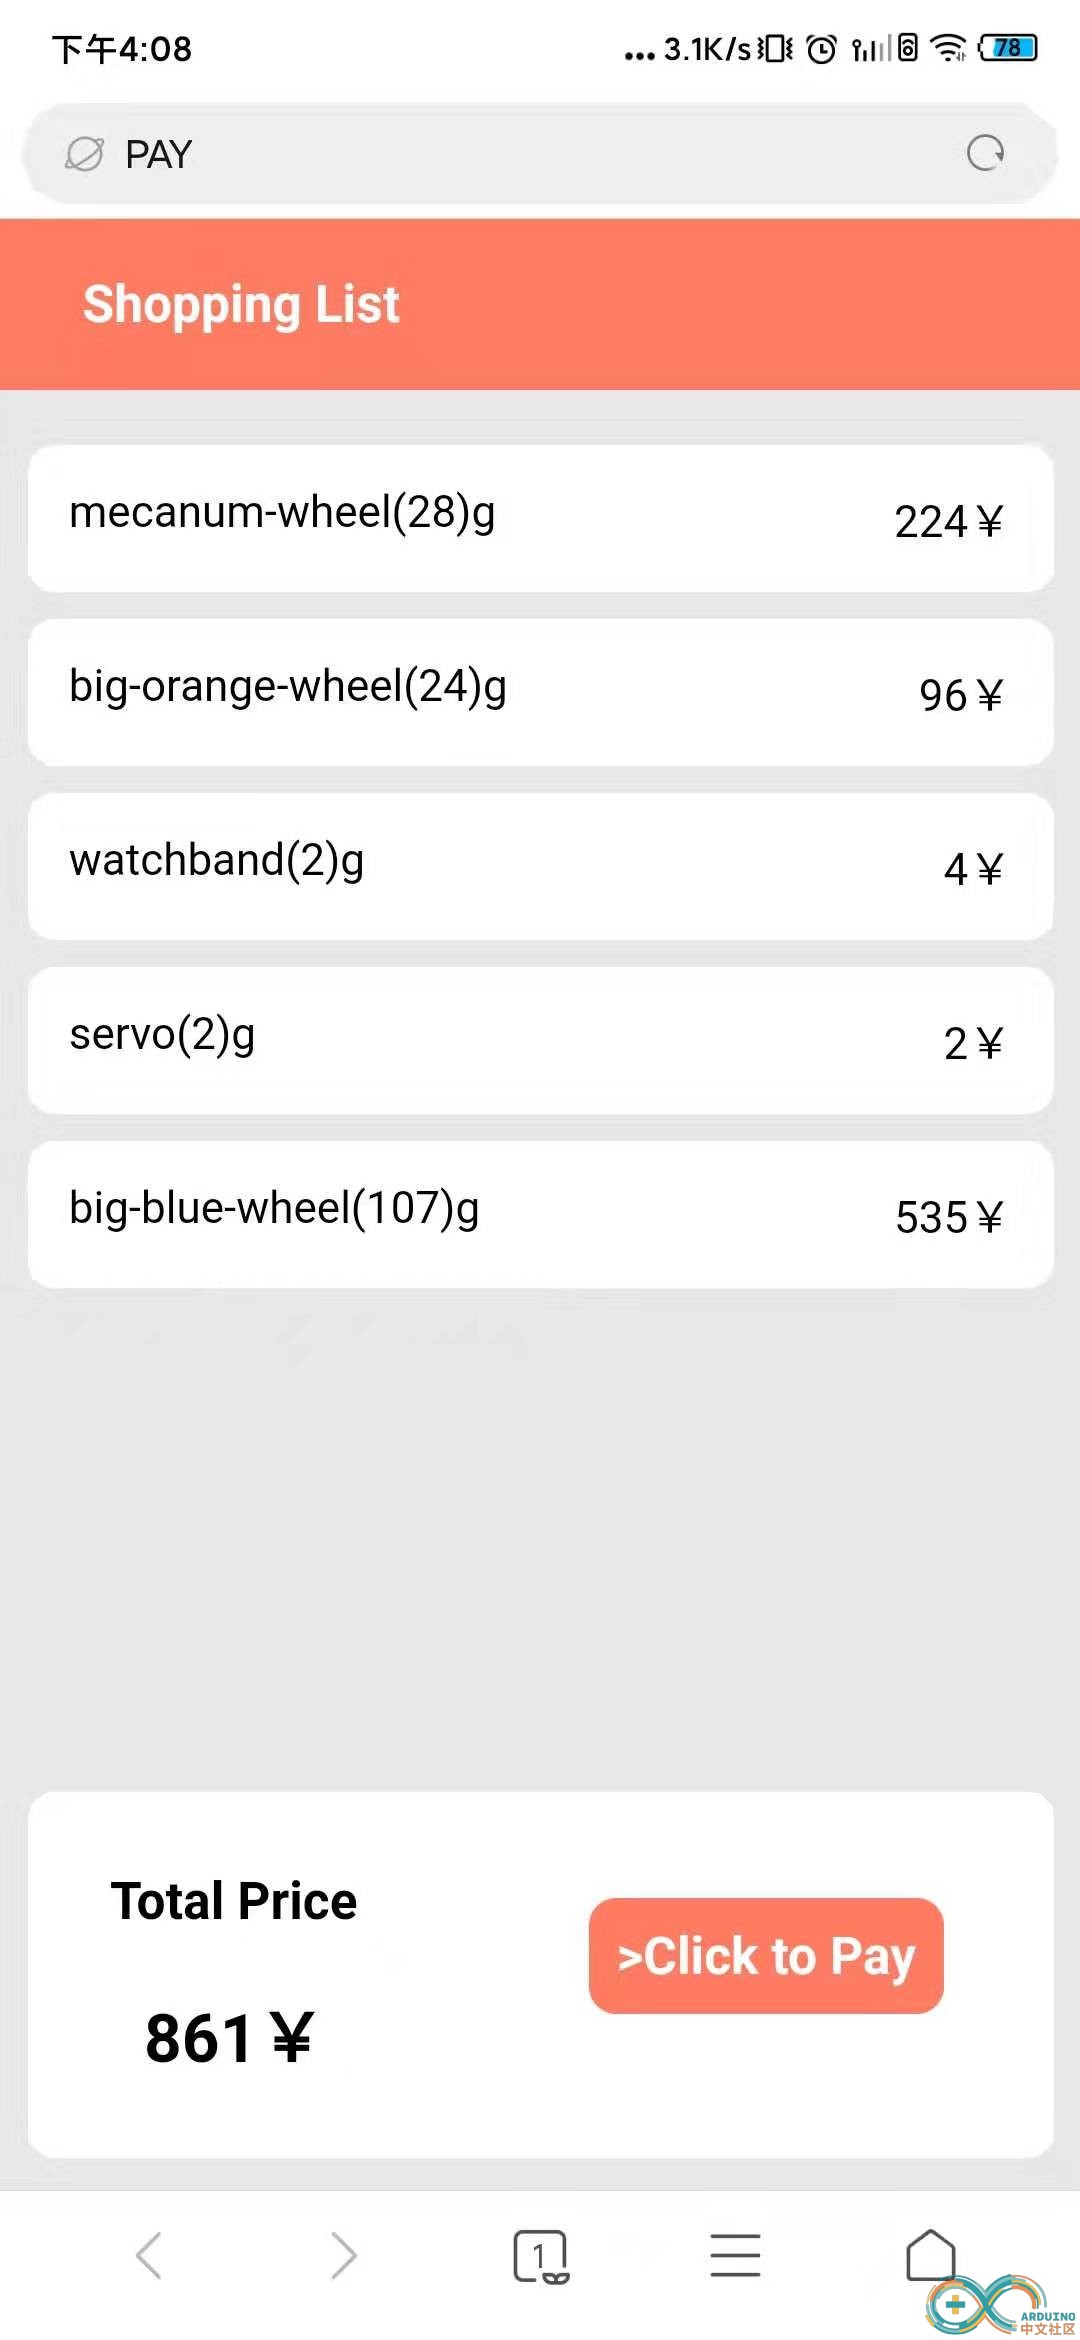
使用基本的"js"、"HTML"、"CSS"代码编辑前端网页,编辑出商品列表基本样式和付款按钮。
使用AJAX,发送HTTP请求,获取后端数据,并实现网页局部内容更新。再付款页面加载完成后,调用请求函数,获取后端商品数据。通过回调函数、DOM操作将数据更新至相应的HTML标签中。

[mw_shl_code=html,true]<!DOCTYPE html>
<html lang="en">
<head>
<meta charset="UTF-8">
<meta name="viewport" content="width=device-width, initial-scale=1.0">
<meta http-equiv="X-UA-Compatible" content="ie=edge">
<title>PAY</title>
<style>
.box{
display: -webkit-flex;
display: flex;
flex-direction: column;
position: absolute;
left: 0px;
top:0px;
width: 100%;
height: 100%;;
background-color:#e8e8e8;
justify-content:space-between;
}
.title{
padding: 20px 30px 20px 30px;
background-color: #ff7c62;
color: white;
margin-top:0px;
margin-bottom:0px;
}
.content{
margin-top: 10px;
height: 500px;
overflow-y:scroll;
}
.content div{
margin-top: 10px;
border-radius: 10px;
margin: 10px;
background-color:white;
padding: 15px;
display: flex;
flex-direction: row;
justify-content: space-between;
transition: all .5s ease;
}
.content div.clear{
transform: translateX(110%);
opacity: 0.3;
}
.foot{
display: -webkit-flex;
display: flex;
flex-direction:row;
justify-content: space-between;
background-color:white;
padding: 10px 30px 10px 30px;
border-radius: 10px;
margin: 10px;
margin-bottom:20px;
}
.btn {
margin: 10px;
}
.btn h3 {
padding: 10px;
border-radius: 10px;
background-color: #ff7c62;
color: white;
}
.total_price{
display: flex;
flex-direction: column;
}
.keyboard{
display: flex;
flex-direction: column;
}
.keyboard div{
display: flex;
flex-direction: row;
justify-content:space-between;
}
.keyboard div h3{
padding: 30px;
margin: 0px;
}
</style>
</head>
<body>
<div class="box">
<h3 class="title">Shopping List</h3>
<div class="content">
<div><h3 style="margin: 10px">Empty Shopping Cart</h3></div>
</div>
<div class="foot">
<div class="total">
<h3>Total Price</h3>
<h2 style="text-align: center;">xxx</h2>
</div>
<div class="btn"><h3>>Click to Pay</h3></div>
</div>
</div>
</body>
<script>
function price_handle(product_name,product_weight){
if(product_name == "watchband"){
return product_weight*2
}else if(product_name == "big-orange-wheel"){
return product_weight*4
}else if(product_name == "orange-wheel"){
return product_weight*6
}else if(product_name == "mecanum-wheel"){
return product_weight*8
}else if(product_name == "big-blue-wheel"){
return product_weight*5
}else if(product_name == "servo"){
return product_weight*1
}else if(product_name == "white-wheel"){
return product_weight*7
}
}
function sleep(delay){
var start = new Date().getTime();
while (new Date().getTime() < start + delay);
}
var httpRequest;
function get_list(){
if(window.XMLHttpRequest) {
httpRequest = new XMLHttpRequest();
}else if(window.ActiveXObject) {
httpRequest = new ActiveXObject();
}
httpRequest.open("GET", "/get_list", true);
httpRequest.onreadystatechange = res_handle;
httpRequest.send();
}
function res_handle(){
if(httpRequest.readyState==4) {
if(httpRequest.status==200) {
var product_list = httpRequest.responseText;
var old_list = document.getElementsByClassName("content")[0].innerHTML = '';
if(product_list == "ok"){
var old_list = document.getElementsByClassName("content")[0].innerHTML = '<div><h3 style="margin: 10px">Empty Shopping Cart</h3></div>';
document.getElementsByClassName("btn")[0].getElementsByTagName("h3")[0].innerHTML="Already Paid";
document.getElementsByClassName("btn")[0].getElementsByTagName("h3")[0].style.backgroundColor="#007bff";
document.getElementsByClassName("total")[0].getElementsByTagName("h2")[0].innerHTML= "0¥";
}
else{
var data = JSON.parse(product_list);
var total_price = 0;
for(var key in data){
var prduct_price = price_handle(key,data[key]);
var item_str = "<span>"+key+"("+data[key]+")g</span><span>"+prduct_price+"¥</span>";
var div_tag = document.createElement('div');
div_tag.insertAdjacentHTML("beforeEnd", item_str);
document.getElementsByClassName("content")[0].appendChild(div_tag);
total_price += prduct_price;
}
document.getElementsByClassName("total")[0].getElementsByTagName("h2")[0].innerHTML= total_price+"¥";
}
}
}
}
function Paid(){
if(window.XMLHttpRequest) {
httpRequest = new XMLHttpRequest();
}else if(window.ActiveXObject) {
httpRequest = new ActiveXObject();
}
httpRequest.open("GET", "/paid", true);
httpRequest.onreadystatechange = res_handle;
httpRequest.send();
}
function Pay(){
var old_list = document.getElementsByClassName("content")[0].getElementsByTagName("div");
var i = 0;
var t1 = setInterval(function () {
if(old_list.length>i){
old_list.className = 'clear';
i++;
}else
{
window.clearInterval(t1);
old_list = document.getElementsByClassName("content")[0].innerHTML = '';
document.getElementsByClassName("btn")[0].removeEventListener("onclick",Pay);
Paid();
}
}, 200);
}
document.getElementsByClassName("btn")[0].onclick=function(){Pay()};
get_list();
</script>
</html>[/mw_shl_code]
后端部分
称重数据
使用M5Stack称重DIY套件搭建电子秤应用,使用M5GO获取称重数值.
识别数据
使用串口通信从M5StickV获取扫描到的商品类型,为了防止重复扫描多次,造成错误添加,程序上使用按键触发商品添加.识别商品与重量信息,以JSON格式进行保存.在路由操作时,作为内容响应.
路由使用M5GO设备作为后端服务器使用,通过启动AP热点搭建局域网络。当手机或电脑设备连接该AP热点且访问指定URL时,后端路由响应付款页面。设置相关路由,响应"获取商品列表"、"付款"的请求。
[mw_shl_code=arduino,true]#include <WiFi.h>
#include <WiFiClient.h>
#include <WebServer.h>
#include <M5Stack.h>
#include "SPIFFS.h"
#include "AudioFileSourceSPIFFS.h"
#include "AudioFileSourceID3.h"
#include "AudioGeneratorMP3.h"
#include "AudioOutputI2S.h"
AudioGeneratorMP3 *mp3;
AudioFileSourceSPIFFS *file;
AudioOutputI2S *out;
AudioFileSourceID3 *id3;
#include <FastLED.h>
#define NUM_LEDS 10
#define DATA_PIN 15
CRGB leds[NUM_LEDS];
#include "index_test.h" //Web page header file
//===============================================================
// Initialize every attribut we need
//===============================================================
WebServer server(80);
//Enter your SSID and PASSWORD
const char* ssid = "M5Banana";
const char* password = "88888888";
//===============================================================
// This routine is executed when you open its IP in browser
//===============================================================
void play_music(){
file = new AudioFileSourceSPIFFS("/paid.mp3");
id3 = new AudioFileSourceID3(file);
out = new AudioOutputI2S(0, 1); // Output to builtInDAC
out->SetOutputModeMono(true);
mp3 = new AudioGeneratorMP3();
mp3->begin(id3, out);
while(true){
if (mp3->isRunning()) {
if (!mp3->loop()) mp3->stop();
} else {
Serial.printf("MP3 done\n");
delay(100);
break;
}
}
}
void homepage() {
String s = MAIN_page; //Read HTML contents
Serial.println("hello");
server.send(200, "text/html", s); //Send web page
}
void get_list() {
server.send(200, "text/html", "{\"apple\":155,\"banana\":233,\"orange\":222,\"watermelon\":400}");
fill_solid(leds, 10, CRGB::Green);
FastLED.show();
}
void paid() {
server.send(200, "text/html", "ok");
fill_solid(leds, 10, CRGB::Blue);
FastLED.show();
play_music();
}
//===============================================================
// Setup
//===============================================================
void setup(void){
M5.begin();
Serial.println();
Serial.println("Booting Sketch...");
SPIFFS.begin();
FastLED.addLeds<NEOPIXEL, DATA_PIN>(leds, NUM_LEDS);
Serial1.begin(115200, SERIAL_8N1, 21, 22);
//ESP32 connects to your wifi -----------------------------------
WiFi.softAP(ssid, password); //Connect to your wifi
Serial.println("Connecting to ");
Serial.print(ssid);
//If connection successful show IP address in serial monitor
Serial.println("");
Serial.print("Connected to ");
Serial.println(ssid);
Serial.print("IP address: ");
Serial.println(WiFi.softAPIP()); //IP address assigned to your ESP
//----------------------------------------------------------------
server.on("/", homepage);
server.on("/get_list", get_list);
server.on("/paid", paid);
server.begin(); //Start server
Serial.println("HTTP server started");
fill_solid(leds, 10, CRGB::Black);
FastLED.show();
}
void loop(void){
M5.update();
server.handleClient();
if (M5.BtnA.wasPressed()) {
M5.Lcd.clear(BLACK);
} else if (M5.BtnB.wasPressed()) {
fill_solid(leds, 10, CRGB::Yellow);
FastLED.show();
M5.Lcd.qrcode("192.168.4.1");
} else if (M5.BtnC.wasPressed()) {
M5.Lcd.clear(BLACK);
}
}
[/mw_shl_code]
物体识别
将具备AI识别功能的M5StickV摄像头固定在铝型材框架上搭建结构顶部,用作物体识别。使用SD卡,参照官网V-Training服务教程(AI识别模型训练服务),构建物体识别模型,达到识别物体效果。
V-Training使用教程: https://docs.m5stack.com/#/en/related_documents/v-training
完成模型训练后,修改启动程序文件“boot.py”,将M5StickV的拓展接口定义为串口使用。并将识别信息通过串口发送至M5GO。
注:在进行素材拍摄时请尽可能接近实际使用环境的光线、背景条件。你可以根据实际模型培训结果的识别率对你的程序进行修改,如容易发生误识别的物体,能够设置较高的识别率判定条件,或设置一定的识别有效次数。以减少误识别情况的发生
使用说明
1 将所有设备启动,并连接USB线供电,等待设备启动,初始化完成.
2 将商品放置到称重区,按下M5GO按键A进行添加.添加成功,M5GO屏幕将显示当前物体重量以及价格.(注意:每按下一下按键,将添加一次商品,当按下按键后,若没有扫描到产品,M5GO将停留在扫描页面,直到扫描到商品为止.)
3 添加完产品后按下M5GO的按键B,将进入结算页面,屏幕上将显示出一个二维码.此时请使用手机或电脑设备打开WIFI,连接SSID为M5Pay的热点.连接完成后,使用相机扫描屏幕上的二维码或是直接访问192.168.4.1打开结算网页.
4 打开网页将自动加载购物车列表,价格等信息. 点击付款按钮,待M5GO主机发出提示音,并显示已付款则表示结算完成.(注意:中途若是需要继续添加商品,可以点击M5GO按键A继续添加,手机网页刷新即可刷新购物车列表)
案例程序
Github:https://github.com/Gitshaoxiang/Project_example/tree/master/M5_supermarket
|