|
|
本帖最后由 xiansen_shun 于 2016-6-8 17:51 编辑
树莓派配合DHT11检测温湿度
DHT11 可以同时检测空气中的温度和湿度,
精度如下。
型号:DHT11
测量范围:20-90%/RH0-50℃
测湿精度:±5%RH
测温精度: ±2℃
分辨能力:1
做这个例子需要的材料如下
一个有操作系统的树莓派
一个DHT11模块
一个3p杜邦线
我们使用的测试方法还是用WiringPi的库,这个库的安装方法参考之前的安装教程。
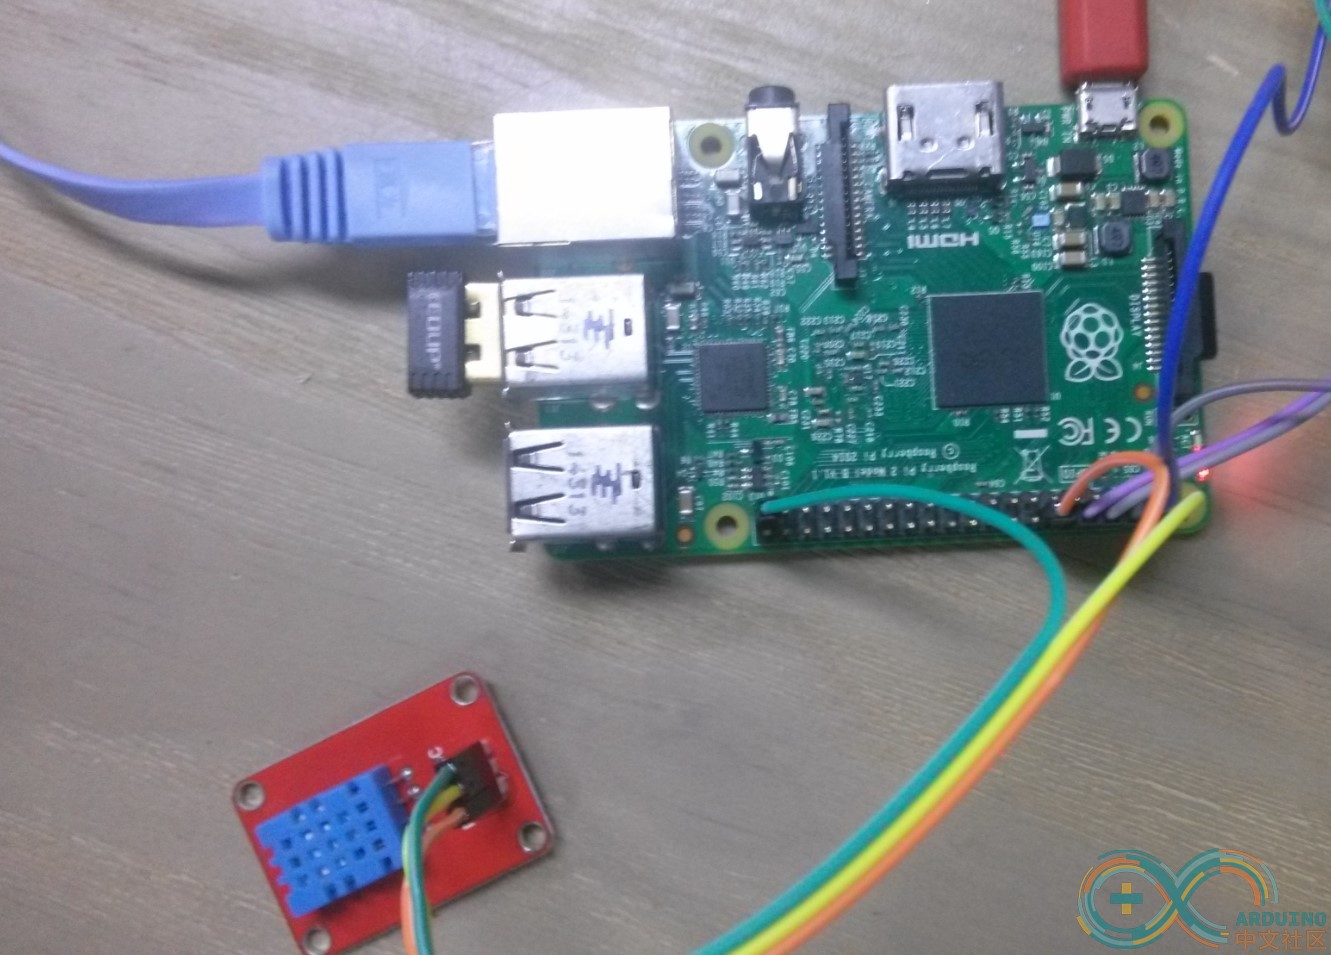
接线方式
dht11 树莓派
S 1
VCC VCC
GND GND

软件部分
$ mkdir dht11
$ cd dht11
$vim dht11.c
然后将下面代码复制进dht11.c的文件中
[mw_shl_code=c,true]/*
* dht11.c:
* Simple test program to test the wiringPi functions
* DHT11 test
*/
#include <wiringPi.h>
#include <stdio.h>
#include <stdlib.h>
#include <stdint.h>
#define MAXTIMINGS 85
#define DHTPIN 1
int dht11_dat[5] = { 0, 0, 0, 0, 0 };
void read_dht11_dat()
{
uint8_t laststate = HIGH;
uint8_t counter = 0;
uint8_t j = 0, i;
float f; /* fahrenheit */
dht11_dat[0] = dht11_dat[1] = dht11_dat[2] = dht11_dat[3] = dht11_dat[4] = 0;
/* pull pin down for 18 milliseconds */
pinMode( DHTPIN, OUTPUT );
digitalWrite( DHTPIN, LOW );
delay( 18 );
/* then pull it up for 40 microseconds */
digitalWrite( DHTPIN, HIGH );
delayMicroseconds( 40 );
/* prepare to read the pin */
pinMode( DHTPIN, INPUT );
/* detect change and read data */
for ( i = 0; i < MAXTIMINGS; i++ )
{
counter = 0;
while ( digitalRead( DHTPIN ) == laststate )
{
counter++;
delayMicroseconds( 1 );
if ( counter == 255 )
{
break;
}
}
laststate = digitalRead( DHTPIN );
if ( counter == 255 )
break;
/* ignore first 3 transitions */
if ( (i >= 4) && (i % 2 == 0) )
{
/* shove each bit into the storage bytes */
dht11_dat[j / 8] <<= 1;
if ( counter > 16 )
dht11_dat[j / 8] |= 1;
j++;
}
}
/*
* check we read 40 bits (8bit x 5 ) + verify checksum in the last byte
* print it out if data is good
*/
if ( (j >= 40) &&
(dht11_dat[4] == ( (dht11_dat[0] + dht11_dat[1] + dht11_dat[2] + dht11_dat[3]) & 0xFF) ) )
{
f = dht11_dat[2] * 9. / 5. + 32;
printf( "Humidity = %d.%d %% Temperature = %d.%d *C (%.1f *F)\n",
dht11_dat[0], dht11_dat[1], dht11_dat[2], dht11_dat[3], f );
}else {
printf( "Data not good, skip\n" );
}
}
int main( void )
{
printf( "Raspberry Pi wiringPi DHT11 Temperature test program\n" );
if ( wiringPiSetup() == -1 )
exit( 1 );
while ( 1 )
{
read_dht11_dat();
delay( 1000 ); /* wait 1sec to refresh */
}
return(0);
}[/mw_shl_code]
然后在保存退出
进行编译
$gcc -Wall -o dht11c dht11.c -lwiringPi
$sudo ./dht11c
这个时候你就能看到页面上的温度和湿度会每一秒种刷新一次。
如图所示:

|
|