|
|
本帖最后由 topdog 于 2020-12-20 21:16 编辑
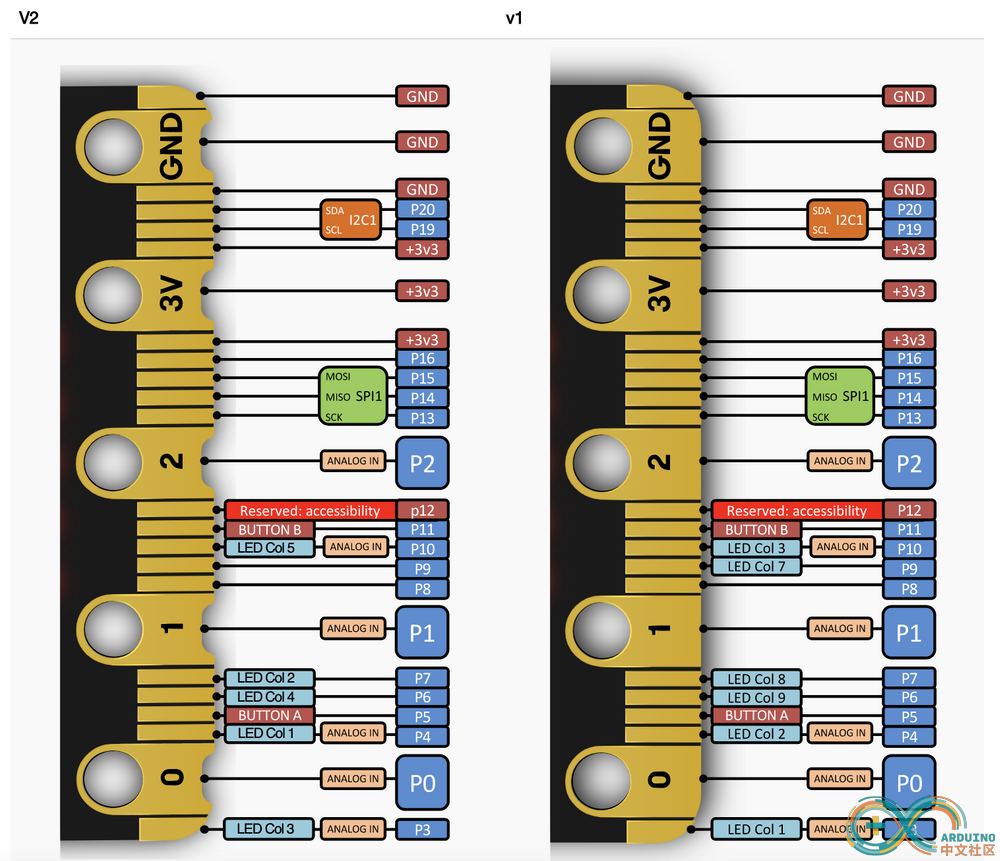
Mico:bit V2 官方英国BBC教育基金会还没有给出线路图,根据部分管脚图推测了一下行和列的管脚,用Arduino写了一下LED matrix跑马灯给有需要的同学们!

行管脚的顺序:21, 22, 23, 24, 25。
列管脚的顺序:4, 7, 3, 6, 10。
可见Mico:bit V2和V1版本是有区别的。
Arduino部署Mico:bit V2 的步骤如下:
第一;打开Arduino IDE 1.8.3 ,点击文件-->首选项-->附加开发板管理器地址处输入:https://sandeepmistry.github.io/arduino-nRF5/package_nRF5_boards_index.json
第二;点击工具-->开发板管理器,点击等待加载。
第三,安装arduino-nRF5 0.7.0版本

第四,安装好以后,开发板里面就有BBC Mico:bit V2 的选项了,再选择对应的端口号就能够编译了。
[pre]const int MATRIX_ROWS = 5; //!< Number of rows on the microbit LED matrix
const int MATRIX_COLS = 5; //!< Number of columns on the microbit LED matrix
int rowpins[MATRIX_ROWS] = {
21, 22, 23, 24, 25}; //!< Pin numbers for the rows on the microbit LED matrix
int colpins[MATRIX_COLS] = {
4, 7, 3, 6, 10}; //!< Pin numbers for the columns on the microbit LED matrix
void setup() {
Serial.begin(115200);
}
void loop() {
for(int i = 0; i < 5; i++){
pinMode(colpins, OUTPUT);
digitalWrite(colpins, LOW);
for(int j = 0; j < 5; j++){
pinMode(rowpins[j], OUTPUT);
digitalWrite(rowpins[j], HIGH);
delay(500);
digitalWrite(rowpins[j], LOW);
delay(500);
}
digitalWrite(colpins, HIGH);
}
}[/pre]
|
|